Forester Guide
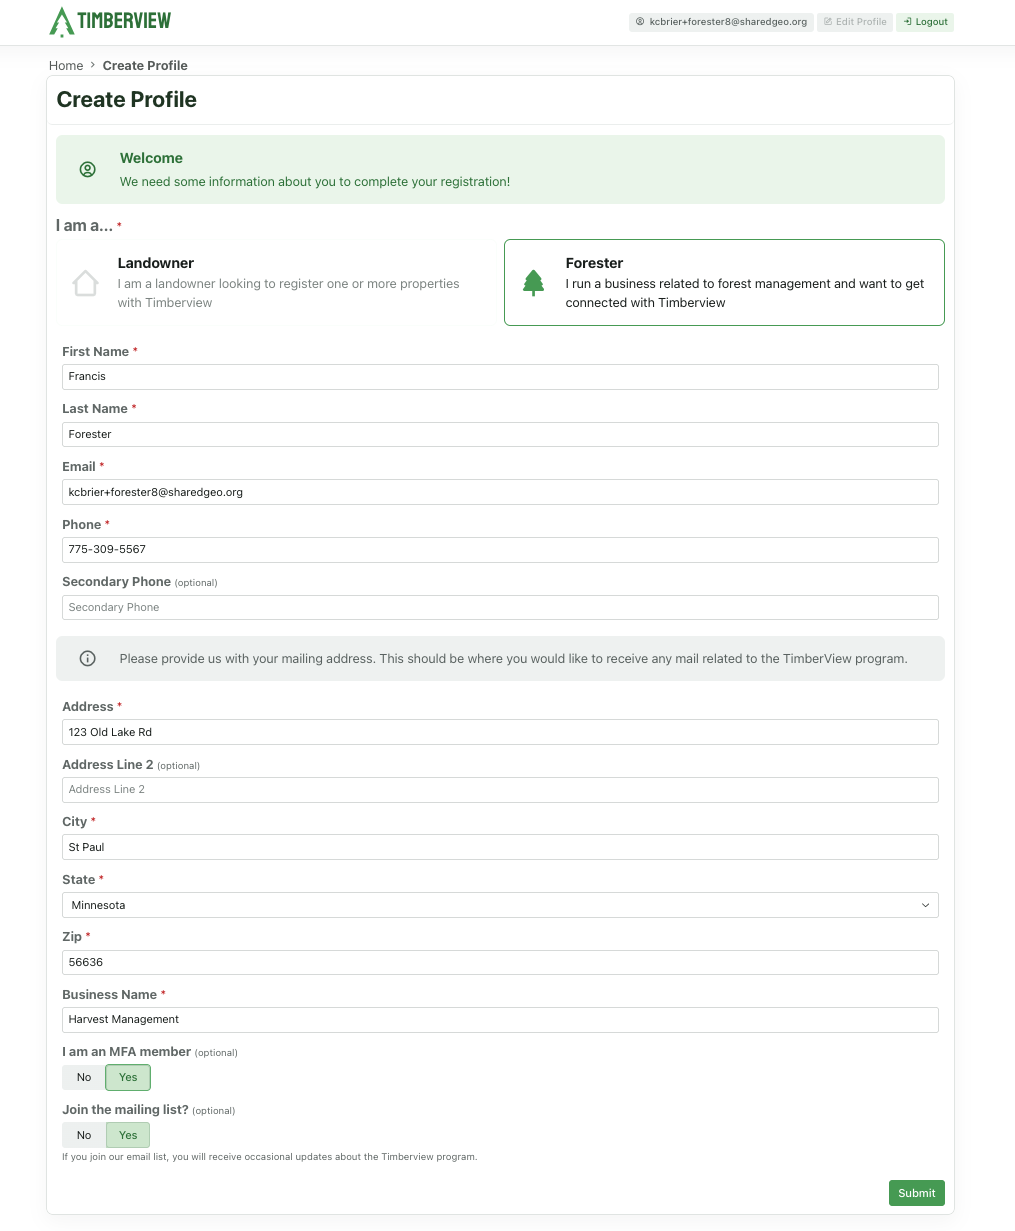
Registration
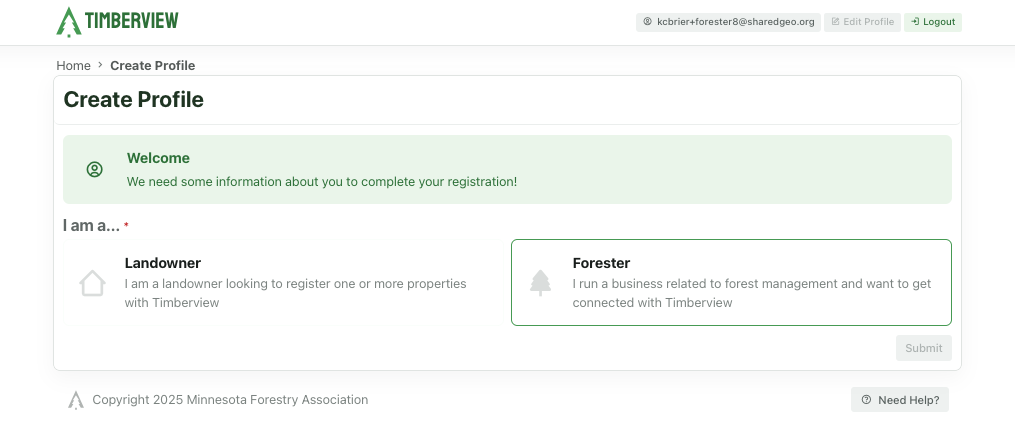
Profile
Application Submitted

Submitted Forester Registration
Note
The TimberView Admin will review your information. Once they have verified your information, you will receive a welcome email from TimberView with a link to login. You must wait for this before you can log into TimberView.
Application Approved

TimberView Invitation
Forester Profile
Profile
Forester Dashboard
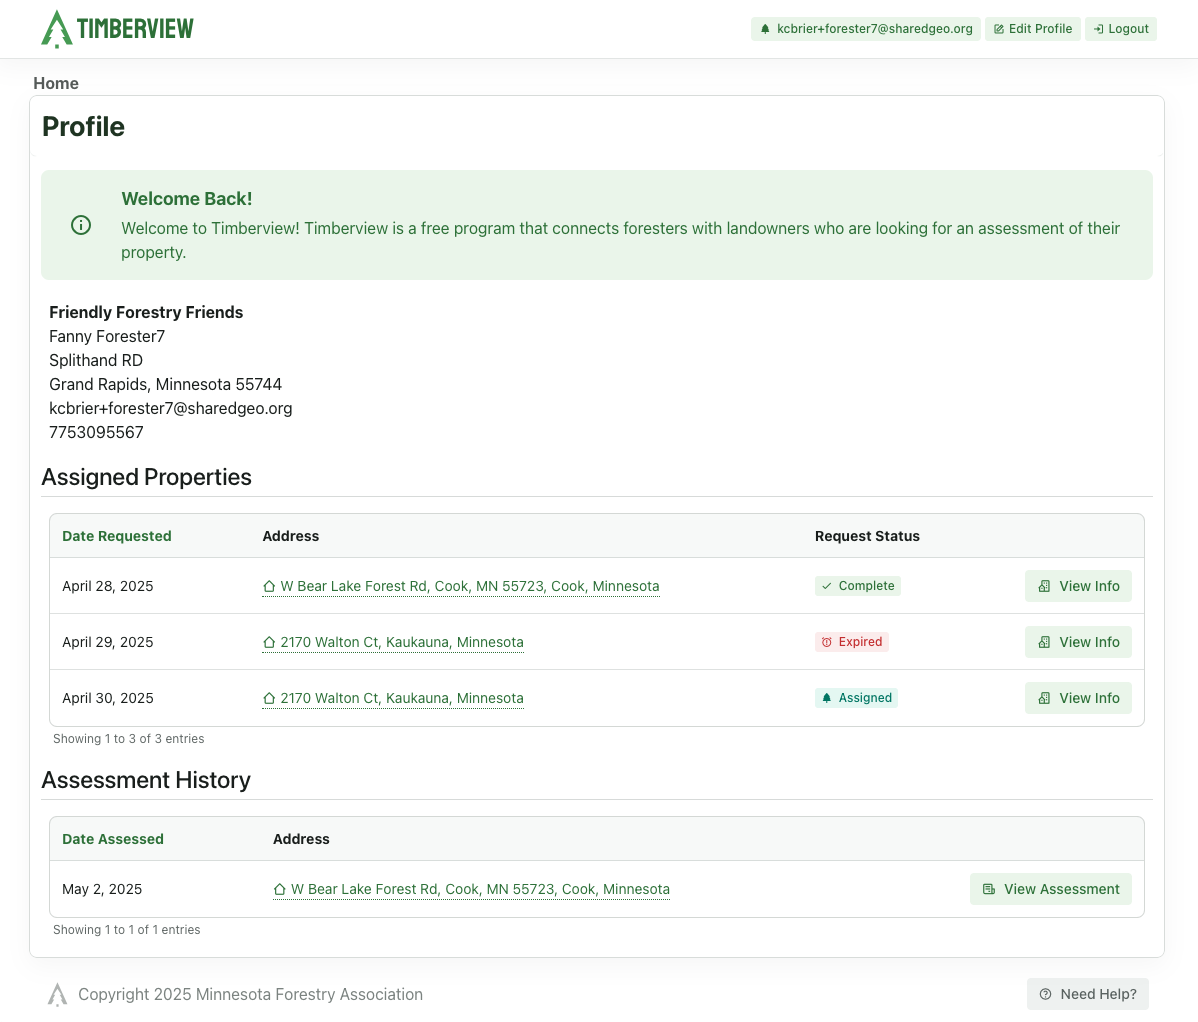
Forester Profile and Dashboard
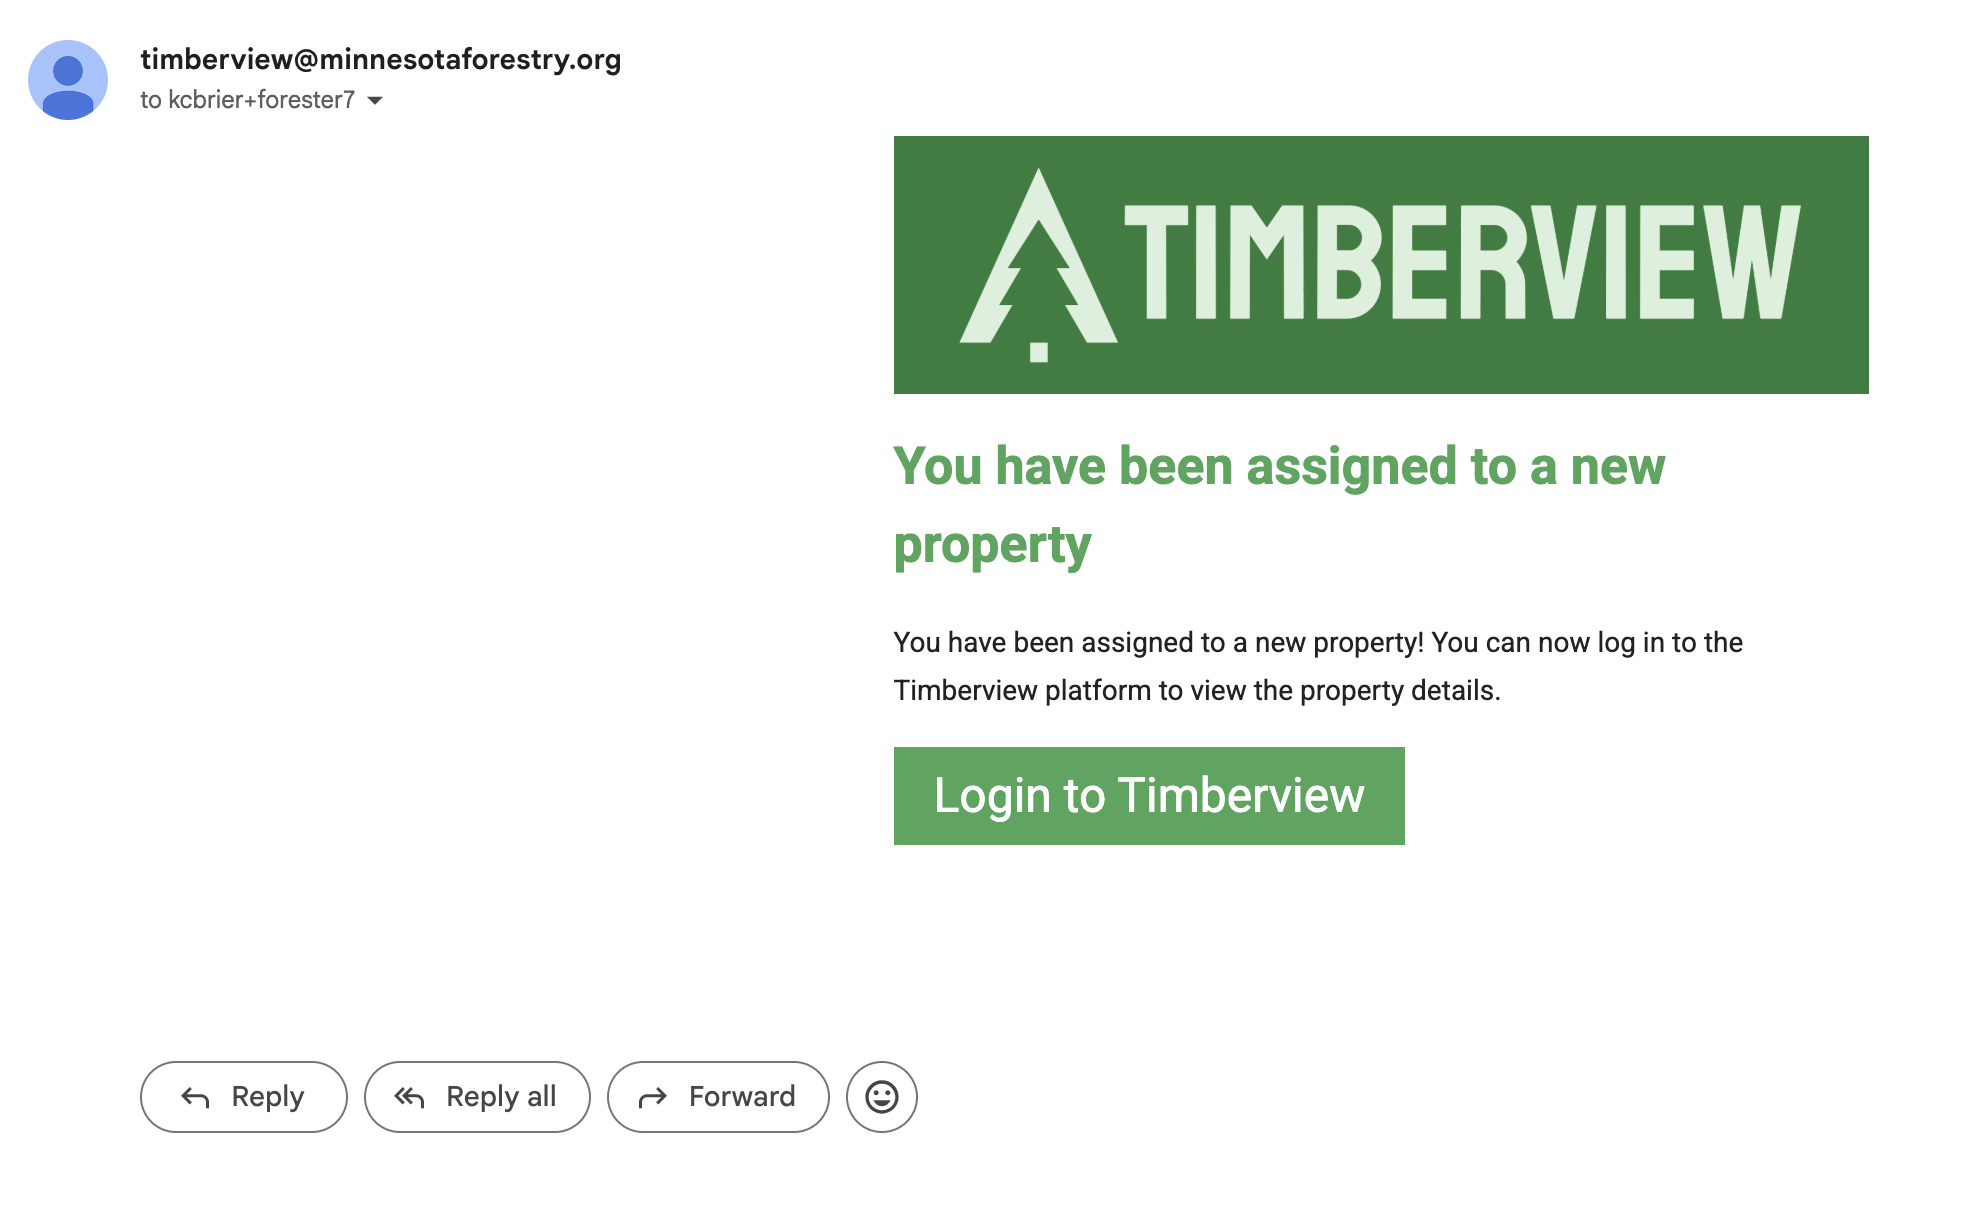
New Assignment
Once you have been assigned an assessment, you will get an email alert at the address in your profile.
New Assessment Request
When you log back into TimberView, the new assignment will appear in your list of Assigned Properties.
New Assessment Request
Assessment Request Details
Open the assessment request using the View Info button next to the property. All available information from the landowner is displayed:
Request Date, notes, contact method, and availability
Address, Parcel ID Map
Request and Assessment History
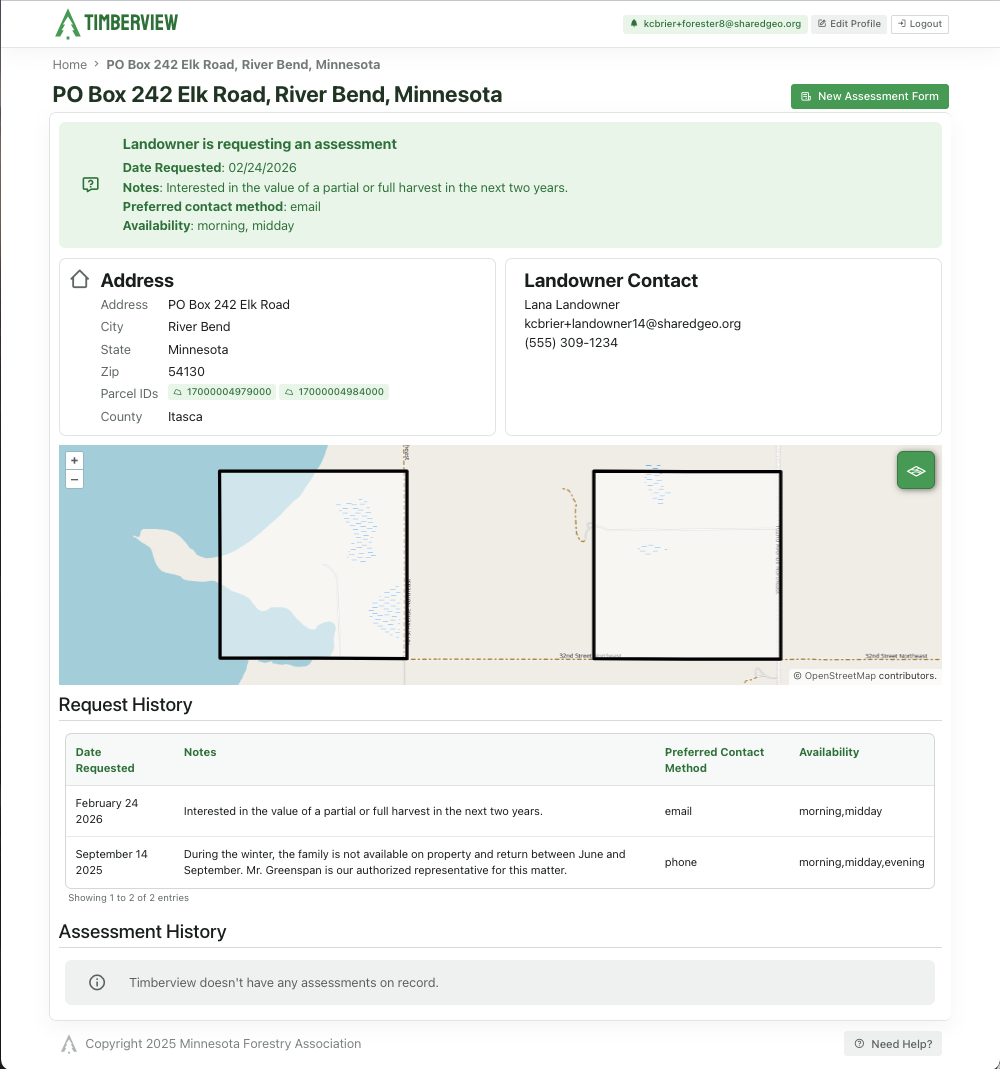
Assessment Request Details
New Assessment
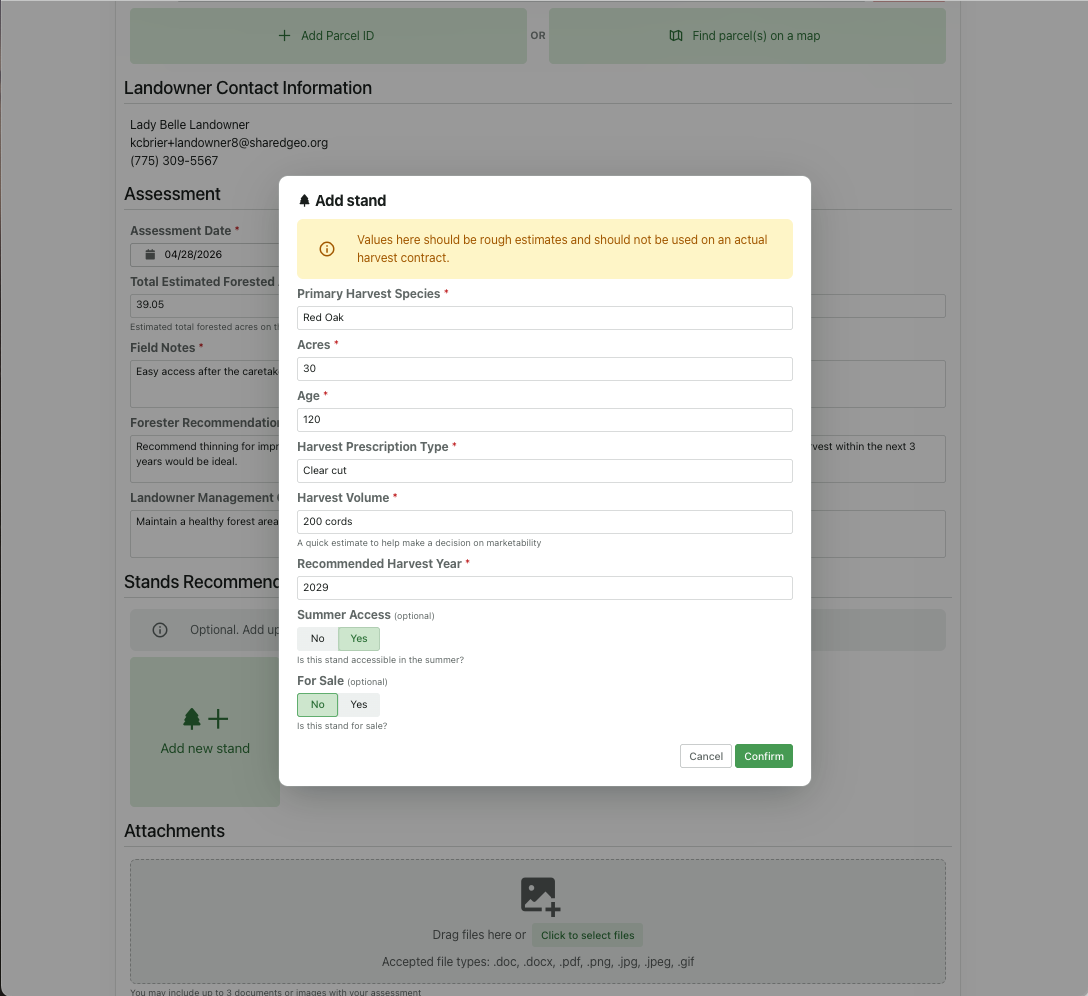
Start Assessment: Once you have performed your walk-thru, use the button at the top right to open a New Assessment Form. Fill out all the required information, including any corrections needed to the original request details.
Stands: Add as much detail as possible regarding the stands identified, any issues noted with the trees, the access to the site, and your recommendations regarding a harvest.
Assessment Request Details
Attachments: Don’t forget to attach any images or other files. TimberView supports the following file types: .doc, .docx, .pdf, .png, .jpg, .jpeg, and .gif.
Submit: Once you have completed the assessment form, select the Submit button at the bottom right to deliver the report.
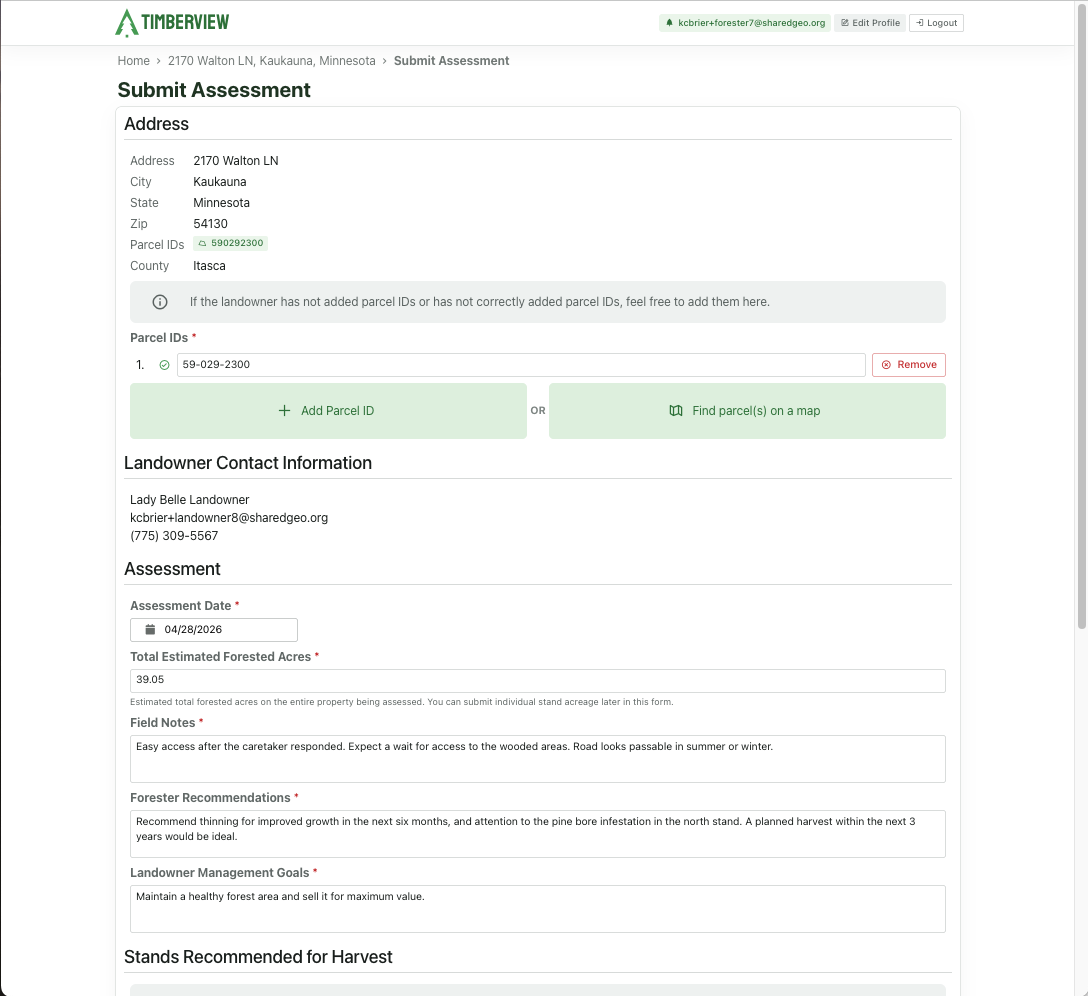
Assessment Submission Form
View Assessment
You can always view your completed assessments from your Dashboard, but you cannot make changes to it. If changes are required, create a new assessment and add a note about why you are replacing the original.
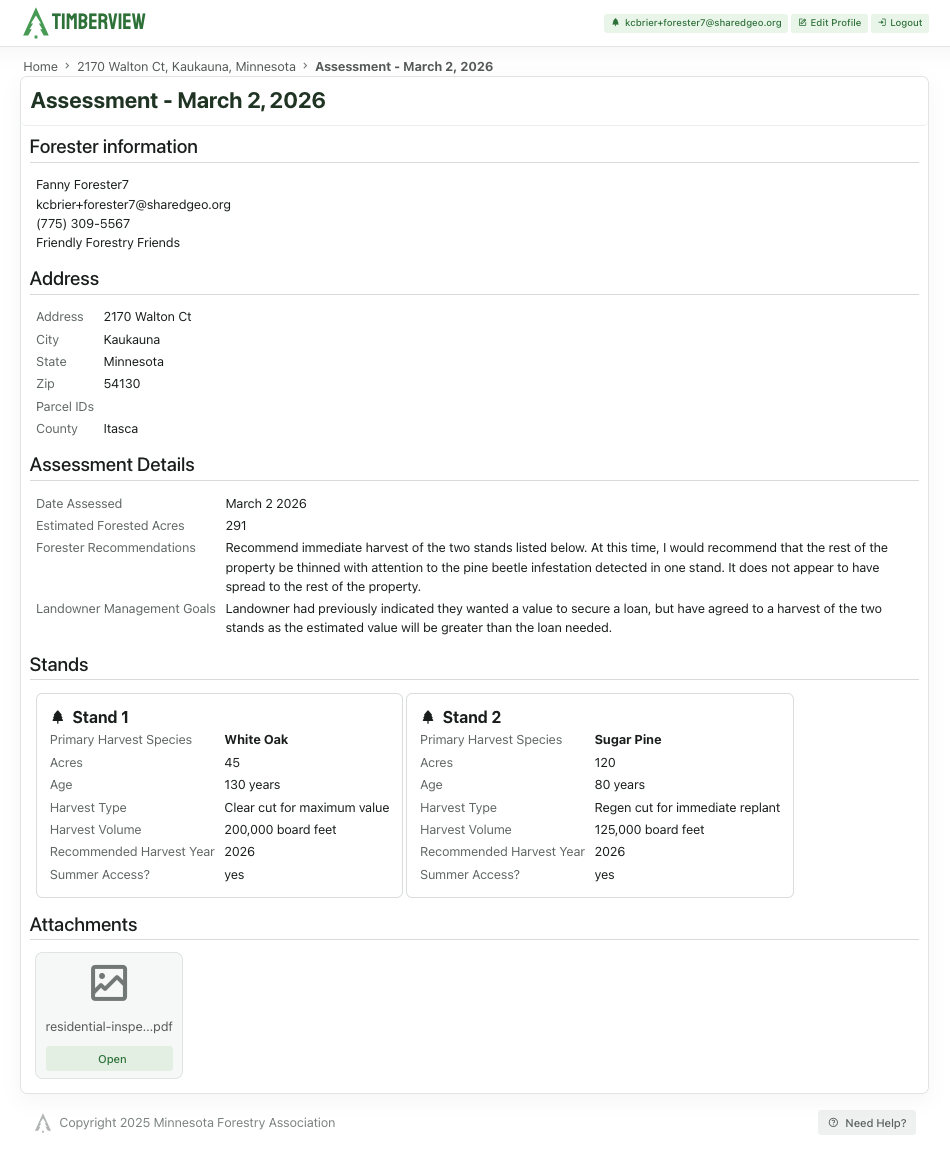
Completed Assessment
Last Updated: Jun 26, 2026